by Dr. John Nosti
Mastering Full Mouth Rehabilitation with CR Dentistry: A Step-by-Step Guide
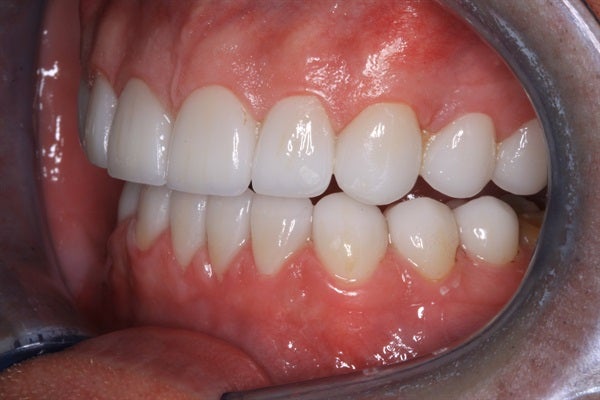
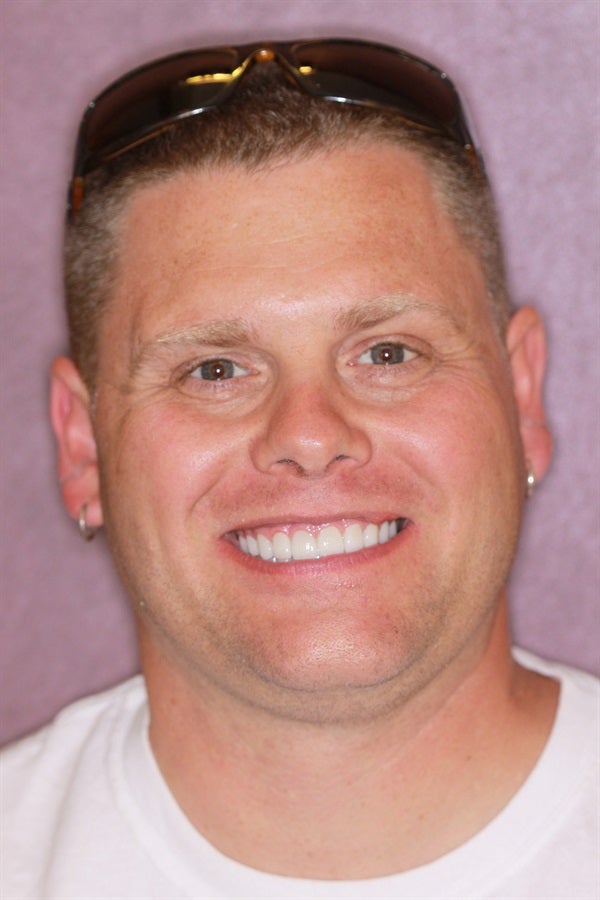
Full mouth rehabilitation using CR dentistry is a comprehensive approach that allows you to restore oral health, functionality, and esthetics for patients with complex dental issues. By understanding the step-by-step process involved in this transformative procedure, you can confidently undertake full mouth rehabilitation cases and provide exceptional care. We will discuss the essential steps of full mouth rehabilitation using CR dentistry, empowering dentists to deliver outstanding results for their patients.
Step 1: Comprehensive Examination and Diagnosis
The foundation of any successful full mouth rehabilitation is a thorough examination and accurate diagnosis. Begin by conducting a comprehensive oral examination, including visual assessment, dental photos,
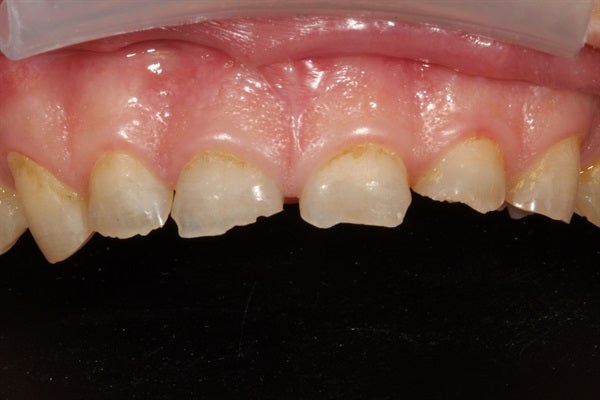
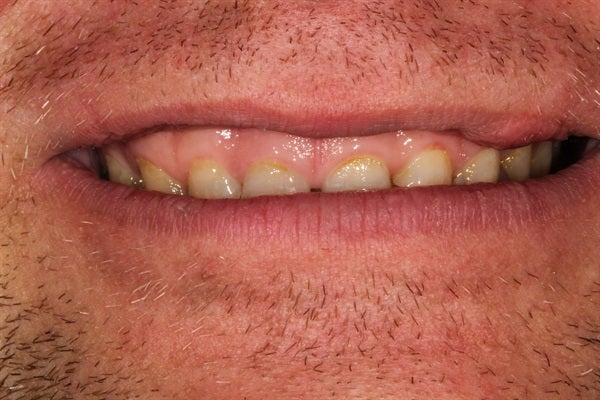
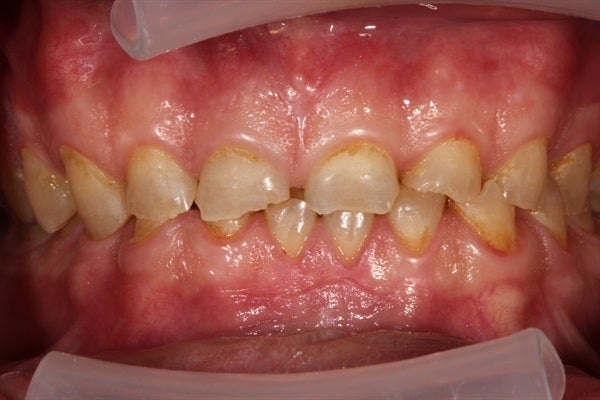
radiographs, joint vibration analysis, CBCT and digital imaging. Systems that need to be assessed for predictability in stabilizing include patient's occlusion (bite), the condition of the teeth, periodontal health, TMJ function, and esthetic concerns. At Clinical Mastery Series, we have taught these systems in our Ultimate Occlusion Level 1-3 programs for more than 15 years with predictable success.
Step 2: Centric Relation (CR) Records and Analysis
CR records are crucial in determining the optimal jaw position for the patient. Diagnostic tools such as deprogrammers, facebows, bite registrations, and digital occlusal analysis are used to capture the centric relation accurately. This allows for a precise evaluation of the patient's occlusion and helps in identifying any discrepancies that may be contributing to functional or esthetic concerns.
Step 3: Comprehensive Treatment Planning with Occlusal Analysis
Once a comprehensive examination and analysis have been completed, develop a detailed treatment plan tailored to the individual patient. Consider their dental needs, desires, and budget, while addressing any functional, esthetic, and occlusal issues. Elements such as evaluating VDO, crown to root ratio, bone and tissue health, periodontal considerations are key to creating a plan that takes into account longevity in your plan. Enlisting the support of a specialist such as an orthodontist, periodontist or oral surgeon - with YOU as the quarterback - can fundamentally improve a patient's outcome if the final restorative needs are taken into account. Clinical Mastery Series Ultimate Occlusion Level 3 - is a 2 day program that focuses on effective Treatment planning with multiple options and budgetary concerns as well as HOW to present the case to a patient, overcome their objections and create confidence in your treatment recommendations. A key to acceptance is managing a patients expectations which is also taught in his phase.
Step 4: Stabilization and Preparatory Phase
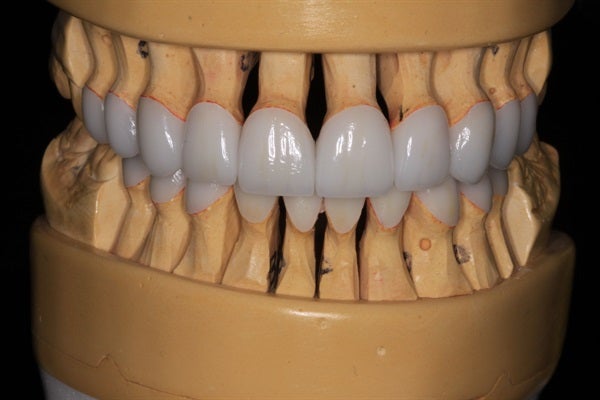
In cases where there are active dental diseases or instability, it is crucial to stabilize the oral environment before proceeding with full mouth rehabilitation. Achieving a healthy and stable foundation is essential for successful long-term outcomes. Starting with tissue management and understanding of where and how you will rebuild function with a diagnostic wax up, reduction guides and provisional stents.
.
Step 5: Restorative Procedures - Preparation & Delivery
With a stable occlusion established, proceed with the necessary restorative procedures as outlined in the treatment plan. This may include dental implants, crowns, bridges, veneers, or dentures, depending on the patient's needs. Utilize digital smile design and mock-up techniques to visualize and communicate the desired esthetic outcomes to the patient before final restorations are fabricated. This can be accomplished through long term provisionals and living splints that allow you to identify any compromises prior to final restorations being made. Learn a system for how to confidently move through the restorative sequence with Clinical Mastery's Full Mouth Rehab: Live in the Op. I'm privileged to walk through a patient's diagnosis to finishing LIVE, for the visual learners that just need to see it done as the next step of their learnign.

Step 6: Equilibration
Occlusal equilibration involves carefully adjusting the biting surfaces of the teeth to achieve a harmonious occlusion and proper distribution of forces during function. This step plays a critical role in achieving optimal occlusion and long-term success of the full mouth rehabilitation and is required after final cementation.
Step 7: Occlusal Splint Fabrication and Adjustment
Following the completion of restorations, we gerenally recommend an anterior discluder slider splint to protect the new restorations and stabilize the occlusion. Adjust the splint as needed to ensure proper fit and occlusal harmony. This step allows for further fine-tuning of the occlusion and helps prevent potential fracture. Learn fundamentals of splints in our Ultimate Occlusion Level 2 program.
Step 8: Post-Treatment Follow-Up and Maintenance
Re-care exams are key!!! Emphasize the importance of routine check-ups to monitor the overall oral health and occlusal stability. Things can change after cementation and catching it early can allow you to simply maintain your dentistry over the course of a patients care without failure.
Full Mouth Rehabilitation is daunting but doable with the right education, treatment plan, execution and laboratory to support your outcomes. Check out https://clinicalmastery.com/courses/full-mouth-rehab/ for a 2 weekend live course .. where you can see these steps on a live patient and ask any questions you have on cases just like this!